Red, White, & Blue Poke Cake
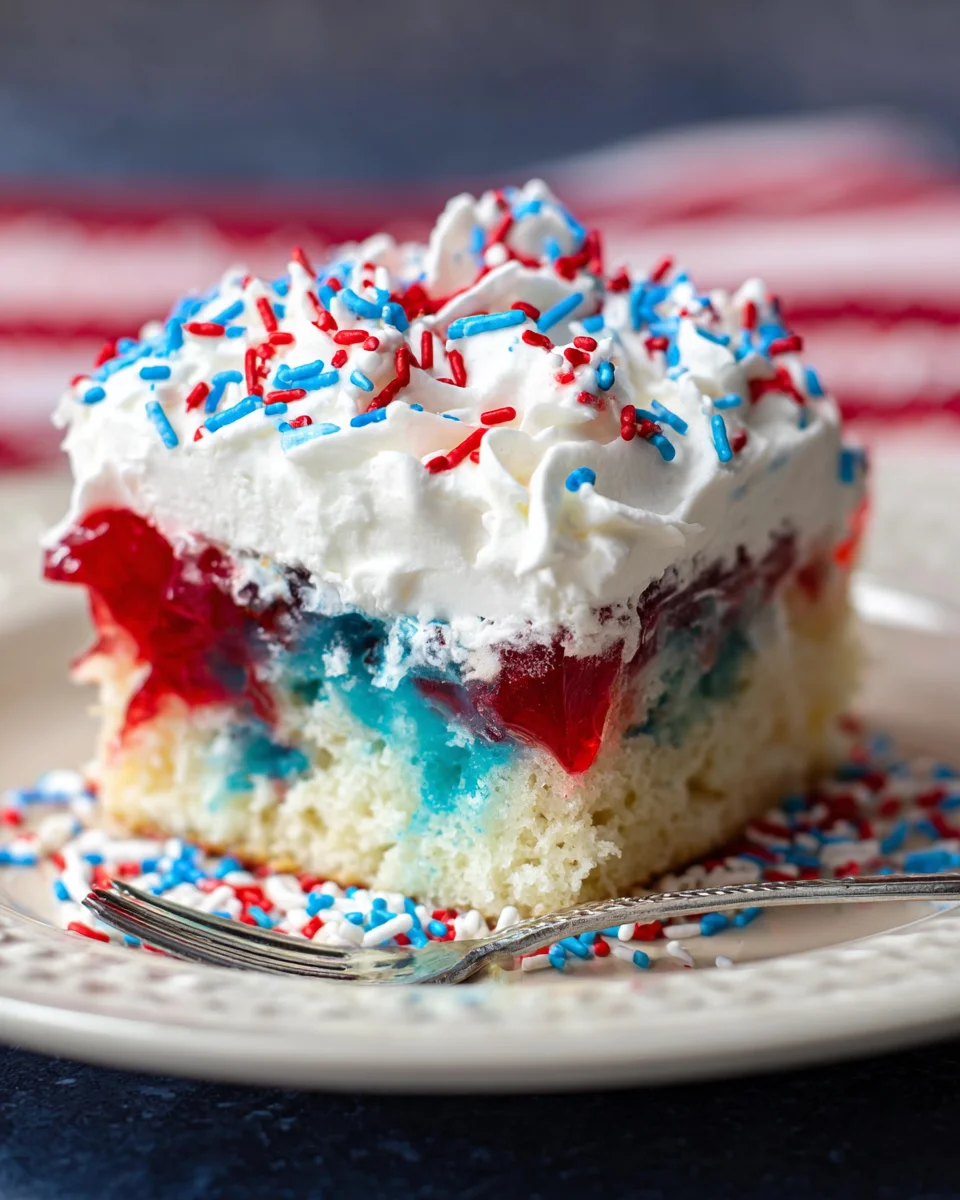
The Red, White, & Blue Poke Cake is the quintessential dessert for any patriotic celebration! This vibrant cake combines a moist white cake with layers of red and blue jello, making it not only delicious but also visually stunning. Perfect for the 4th of July or any summer gathering, this easy-to-make cake is sure to impress your guests. The combination of flavors and colors makes it a standout choice for festive occasions.
Why You’ll Love This Recipe
- Easy to Make: With just a few simple steps, you can whip up this delightful dessert in no time.
- Visually Stunning: The bright red and blue layers create an eye-catching presentation that’s perfect for celebrations.
- Refreshing Flavor: The jello adds a burst of fruity flavor that complements the moist cake beautifully.
- Perfect for Any Occasion: While it’s ideal for Independence Day, this cake works well at birthday parties, picnics, or summer barbecues.
- Feeds a Crowd: This recipe serves 18 people, making it great for gatherings with family and friends.
Tools and Preparation
Before diving into making your Red, White, & Blue Poke Cake, gather your tools. Having everything ready will streamline the process and ensure success.
Essential Tools and Equipment
- Mixing bowl
- Wooden spoon
- 9×13 inch baking dish
- Whisk
- Measuring cups
Importance of Each Tool
- Mixing bowl: A spacious bowl allows you to mix all ingredients without spills.
- Wooden spoon: Ideal for poking holes in the cake and mixing jello without scratching your bakeware.
- 9×13 inch baking dish: The perfect size for even baking and easy serving.
- Whisk: Great for ensuring that your jello mixes seamlessly with water.
Ingredients
Here’s what you need to create this delightful dessert:
Grab This Chef Knife Now - Almost Gone!
- Stays Razor-Sharp: Ice-hardened blade keeps its edge longer than ordinary knives
- Superior Grip Control: Unique finger hole design gives you perfect balance and safety
- Built to Last a Lifetime: Premium stainless steel blade with elegant beech wood handle
Customer Reviews ★★★★★
For the Cake
- 1 Box Cake Mix (White, plus ingredients to make the cake)
For the Jello Layers
- 3 Ounces Jello (cherry)
- 3 Ounces Jello (blue)
- 1 Cup Water (boiling, divided in half)
For Topping
- 8 Ounces Whipped Topping (Cool Whip)
- Sprinkles (red, white and blue)
How to Make Red, White, & Blue Poke Cake
Step 1: Prepare the Cake
- Preheat your oven according to the instructions on the box mix.
- Prepare the white cake as directed on the box. Once mixed thoroughly, pour it into your greased 9×13 inch baking dish.
Step 2: Prepare the Jello
- In separate bowls, combine 1.5 ounces of cherry jello with ½ cup of boiling water. Stir until dissolved.
- Do the same with 1.5 ounces of blue jello in another bowl.
Step 3: Create Holes in the Cake
- After baking the cake until golden brown and letting it cool slightly, use the end of a wooden spoon to poke holes all over the surface.
- Carefully pour half of the cherry jello mixture into some holes and half of the blue jello into others. Be cautious not to mix them!
Step 4: Chill
- Cover your cake with plastic wrap and place it in the refrigerator for at least 30 minutes or up to overnight.
Step 5: Add Toppings
- Once chilled, spread Cool Whip evenly over the top of your cake.
- Finish by sprinkling red, white, and blue sprinkles on top before serving!
Enjoy this festive treat that captures both flavor and fun!
How to Serve Red, White, & Blue Poke Cake
Serving your Red, White, & Blue Poke Cake is just as important as making it. This festive dessert is perfect for celebrations and can be enjoyed in a variety of ways that enhance its flavors and presentation.
Individual Slices
- Serve individual slices on colorful plates to highlight the patriotic theme.
- Add a dollop of whipped topping on top for extra creaminess.
Parfait Style
- Layer pieces of poke cake in cups with additional whipped topping and berries.
- Garnish with fresh strawberries and blueberries for a vibrant look.
Picnic Treats
- Cut the cake into small squares and pack them in containers for easy transport.
- Pair with lemonade or iced tea for a refreshing summer picnic.
Ice Cream Accompaniment
- Serve each slice with a scoop of vanilla or berry-flavored ice cream.
- Drizzle some berry syrup over the cake and ice cream for added flavor.
Birthday Celebration
- Use this poke cake as a birthday cake by adding candles and a festive banner.
- Personalize it with birthday sprinkles to match the theme.
Family Gatherings
- Present the cake on a large platter and let guests serve themselves.
- Set up a toppings bar with extra sprinkles, chocolate sauce, or fruit for custom servings.
How to Perfect Red, White, & Blue Poke Cake
To ensure your Red, White, & Blue Poke Cake turns out perfectly every time, follow these helpful tips. Each suggestion will enhance the flavor and presentation of your delightful dessert.
- Use Fresh Ingredients: Always opt for fresh eggs and dairy when preparing your cake mix for the best flavor.
- Cool Completely: Let the cake cool completely before poking holes; this prevents the jello from melting into the cake too quickly.
- Chill Before Serving: Refrigerate the cake after adding jello to allow flavors to meld together beautifully.
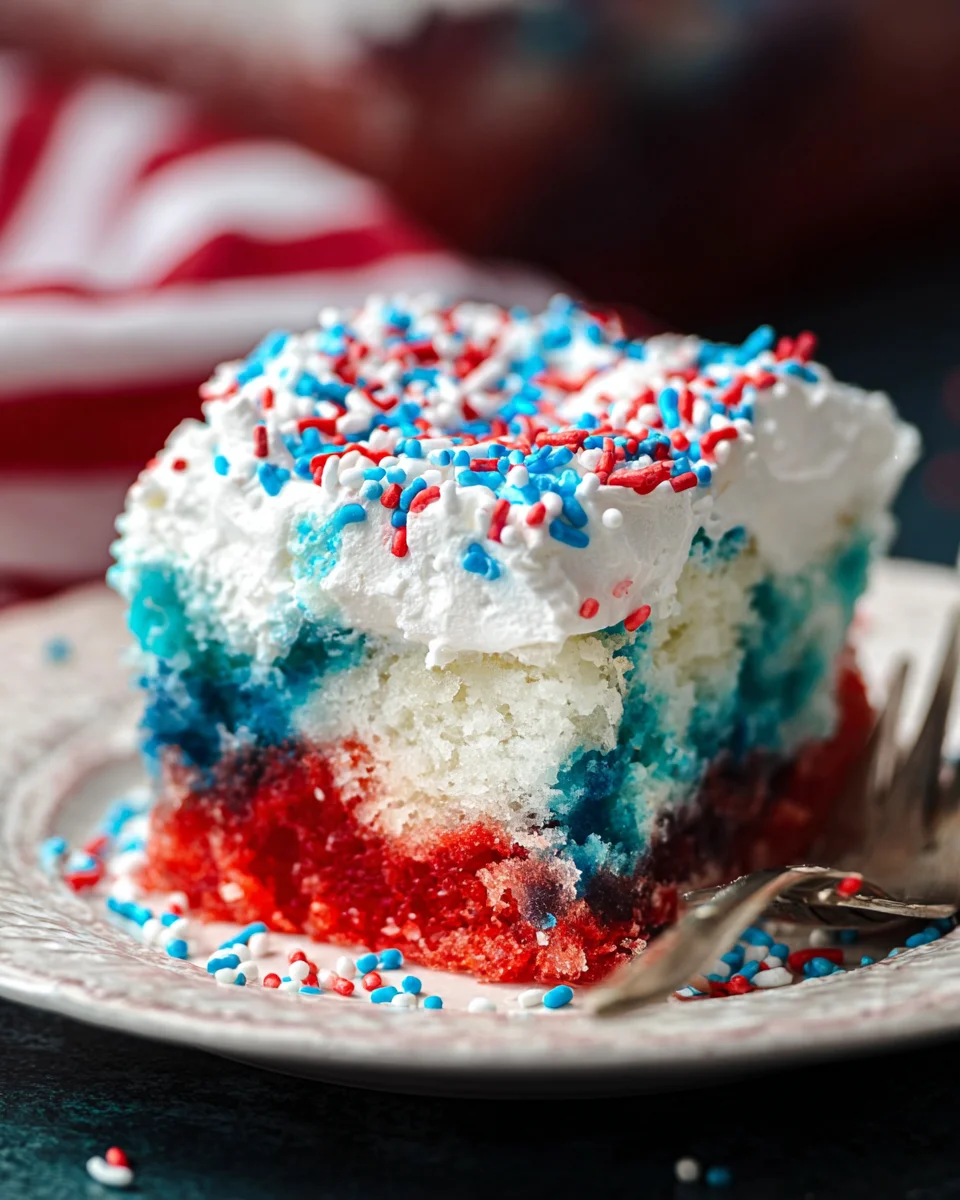
- Layer Wisely: When pouring jello, be careful not to mix the colors; this preserves the vibrant red and blue layers.
- Experiment with Toppings: Feel free to add more toppings like fresh fruits or flavored whipped cream to customize your poke cake.
- Store Properly: Keep leftovers in an airtight container in the refrigerator to maintain freshness for several days.
Best Side Dishes for Red, White, & Blue Poke Cake
Pairing delicious side dishes with your Red, White, & Blue Poke Cake can elevate any gathering. Here are some great suggestions that complement this festive dessert well.
- Grilled Corn Salad: A refreshing salad featuring grilled corn, tomatoes, avocados, and lime dressing—perfect for summer gatherings.
- Fruit Kabobs: Colorful skewers of seasonal fruits like strawberries, blueberries, and pineapple make an easy-to-eat side dish.
- Caprese Salad Skewers: Fresh mozzarella balls, basil leaves, and cherry tomatoes drizzled with balsamic glaze add a savory touch.
- Potato Salad: A classic creamy potato salad enhances any outdoor barbecue while balancing sweetness from the poke cake.
- Veggie Platter: A platter filled with crisp veggies like carrots, cucumbers, and bell peppers served with ranch dip provides crunch contrast.
- Coleslaw: A tangy coleslaw adds freshness and complements rich desserts like poke cake perfectly.
- Deviled Eggs: These tasty bites offer protein alongside sweetness—ideal for filling out your party spread.
- Cheese Board: An assortment of cheeses paired with crackers and fruit brings elegance to your dessert table while pleasing various palates.
Common Mistakes to Avoid
Making a Red White and Blue Poke Cake can be fun, but there are a few common mistakes that can ruin your dessert. Here are some pitfalls to avoid.
- Not allowing the cake to cool: If you pour the jello on a hot cake, it won’t set properly. Always let your cake cool completely before poking holes.
- Mixing jello colors: When pouring in the jello, be careful not to mix the red and blue together. This will make your cake look muddy instead of vibrant.
- Using cold water for jello: Make sure to use boiling water when preparing your jello. Cold water won’t allow the jello to dissolve properly.
- Skipping refrigeration time: Don’t rush this step! Allowing the cake to chill helps the flavors meld together and ensures better texture. Chill for at least 30 minutes or overnight if possible.
- Overdoing toppings: While sprinkles add fun, too many can overpower the cake’s flavor. Use them sparingly for an appealing presentation.
Refrigerator Storage
- Store your Red, White, & Blue Poke Cake in an airtight container.
- It will last for up to 3 days in the refrigerator.
- Keep it covered with plastic wrap if you don’t have a container.
Freezing Red, White, & Blue Poke Cake
- You can freeze slices of the poke cake for up to 2 months.
- Wrap individual slices tightly in plastic wrap followed by aluminum foil to prevent freezer burn.
- Thaw in the refrigerator overnight before serving.
Reheating Red, White, & Blue Poke Cake
- Oven: Preheat your oven to 350°F (175°C). Place slices on a baking sheet and warm for about 10 minutes.
- Microwave: Heat slices on high for about 20-30 seconds. Check frequently to avoid overheating.
- Stovetop: Use a skillet over low heat. Warm covered slices for a few minutes until just heated through.
Frequently Asked Questions
What is a Red, White, & Blue Poke Cake?
A Red, White, & Blue Poke Cake is a festive dessert made with layers of white cake soaked in cherry and blue raspberry jello, topped with whipped cream and patriotic sprinkles.
Can I use different flavors of jello?
Yes! While cherry and blue raspberry are traditional choices, feel free to experiment with other flavors that suit your taste or match holiday themes.
How long does it take to make this poke cake?
The total time is around 45 minutes including preparation and cooking time. Chilling time may vary based on how long you decide to refrigerate it.
Can I customize my toppings for this poke cake?
Absolutely! You can add fresh berries like strawberries or blueberries or even crushed cookies for added texture and flavor.
Is this recipe suitable for special diets?
This recipe contains gluten and dairy due to the cake mix and whipped topping. However, you can modify it using gluten-free cake mix and dairy-free whipped topping if needed.
Final Thoughts
The Red White and Blue Poke Cake is not only visually stunning but also deliciously refreshing. Perfect for summer gatherings or Independence Day celebrations, it’s easy to customize with different jello flavors or toppings. Don’t hesitate to try this delightful treat!

Red, White, & Blue Poke Cake
- Total Time: 45 minutes
- Yield: Serves approximately 18 people 1x
Description
Red, White, & Blue Poke Cake is the ultimate festive dessert for any summer celebration! This vibrant treat features a moist white cake infused with layers of cherry and blue raspberry jello, creating a patriotic masterpiece that’s as delightful to eat as it is to behold. Topped with a generous layer of whipped cream and sprinkled with colorful toppings, this easy-to-make cake will surely impress your guests at barbecues, birthday parties, or Independence Day festivities. With just a few simple steps, you can create a show-stopping dessert that’s perfect for feeding a crowd. Celebrate in style with this refreshing and fun dessert!
Ingredients
- 1 box white cake mix (plus required ingredients)
- 3 ounces cherry jello
- 3 ounces blue raspberry jello
- 1 cup boiling water (divided)
- 8 ounces whipped topping (Cool Whip)
- Red, white, and blue sprinkles for garnish
Instructions
- Preheat your oven according to package instructions. Prepare the white cake mix as directed and pour into a greased 9×13 inch baking dish.
- In two separate bowls, dissolve 1.5 ounces of cherry jello in ½ cup boiling water each for cherry and blue raspberry jello.
- Once the cake cools slightly, poke holes all over the surface using the end of a wooden spoon. Pour cherry jello into half of the holes and blue raspberry jello into the others.
- Cover with plastic wrap and refrigerate for at least 30 minutes or overnight.
- Spread Cool Whip over the chilled cake and top with red, white, and blue sprinkles before serving.
- Prep Time: 15 minutes
- Cook Time: 30 minutes
- Category: Dessert
- Method: Baking
- Cuisine: American
Nutrition
- Serving Size: 1 slice (85g)
- Calories: 210
- Sugar: 20g
- Sodium: 300mg
- Fat: 7g
- Saturated Fat: 3g
- Unsaturated Fat: 4g
- Trans Fat: 0g
- Carbohydrates: 34g
- Fiber: <1g
- Protein: 2g
- Cholesterol: 25mg


